
Hello there, and congratulations on choosing Dota 2. It may be your very first MOBA experience, or perhaps you’re a seasoned veteran from a different MOBA game such as League of Legends or Smite. Either way, it doesn’t matter because Dota 2 will teach you to forget everything you’ve learned about MOBAs in the past. Over 110 unique heroes, each of them with at least 4 spells. And 6 item slots per hero, plus things likes buffs and debuffs. But let’s talk about the experience for newcomers first- you’ll be thrown into a game with 9 random people who may or may not speak the same language as you. Some of them will be “smurfs”, i.e. players with a lot more experience than you who got tired of losing on their mains accounts and decided to own some noobs with a new account. The built-in tutorial doesn’t teach you a whole lot, and toxicity is rampant. So how do you persevere through your first couple of games without feeling the urge to uninstall Dota as you constantly get flamed by teammates who spam ping you every time you die? Well, you need to do some serious prep work before jumping into an actual multiplayer game. Read some guides, watch tutorial videos aimed at beginners, and play a few bot matches. Once you feel comfortable with the basic mechanics, camera control, UI, etc. you can hone your skills vs human players in Turbo mode where resources like gold and XP are earned at a much faster rate, and games are shorter.
Before I go any further, I have to remind you that Dota 2 is constantly evolving. Items, hero abilities, and even the map itself can receive changes or complete reworks between the time I wrote this guide and when you read it. But a lot of the basic concepts will stay the same, and that’s what I will be focusing on with my guide. I will help you grasp the underlying concepts while also giving you the means to think about more advanced stuff by yourself. With that said, let’s dive right in.
What Is Dota 2?
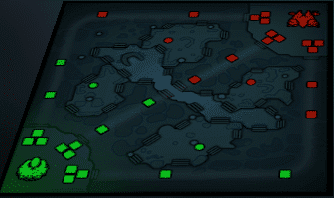
So, exactly what is Dota 2? The name comes from the original DotA which is a Warcraft III mod. It’s an acronym for “Defense of the Ancients”. The name pretty much says it all- you’ve got to defend your Ancient while simultaneously trying to destroy the enemy Ancient. Whichever team destroys the enemy ancient first, wins. The square-shaped map is divided into two sides along a diagonal line passing through the middle. The bottom half is home to a faction called the Radiant who are the good guys. And the top half is home to the evil guys, Dire. Within a match, you play as either Dire or Radiant. In standard matchmaking, there are 5 players in each team. Each player will have to choose a hero from the gigantic pool of over 117, and no two players can choose the same hero. The map stays the same in every single match, which may cause you to think that the game is boring. Actually, no two matches are ever the same. This comes down to the massive variety within hero playstyles and skill builds, itemization, variation in roles, etc. The nice thing about Dota is that all heroes are free for everyone, right from the start. You don’t have to pay real money or grind for hundreds of hours to unlock that one hero you really like. Everybody starts on the same page, there are no runes and masteries like in League. No pre-game loadouts or benefits that can be purchased. The only thing separating you and a professional playing for millions of dollars in The International is the skill difference between both of you.

Understanding The Dota Map And Resources
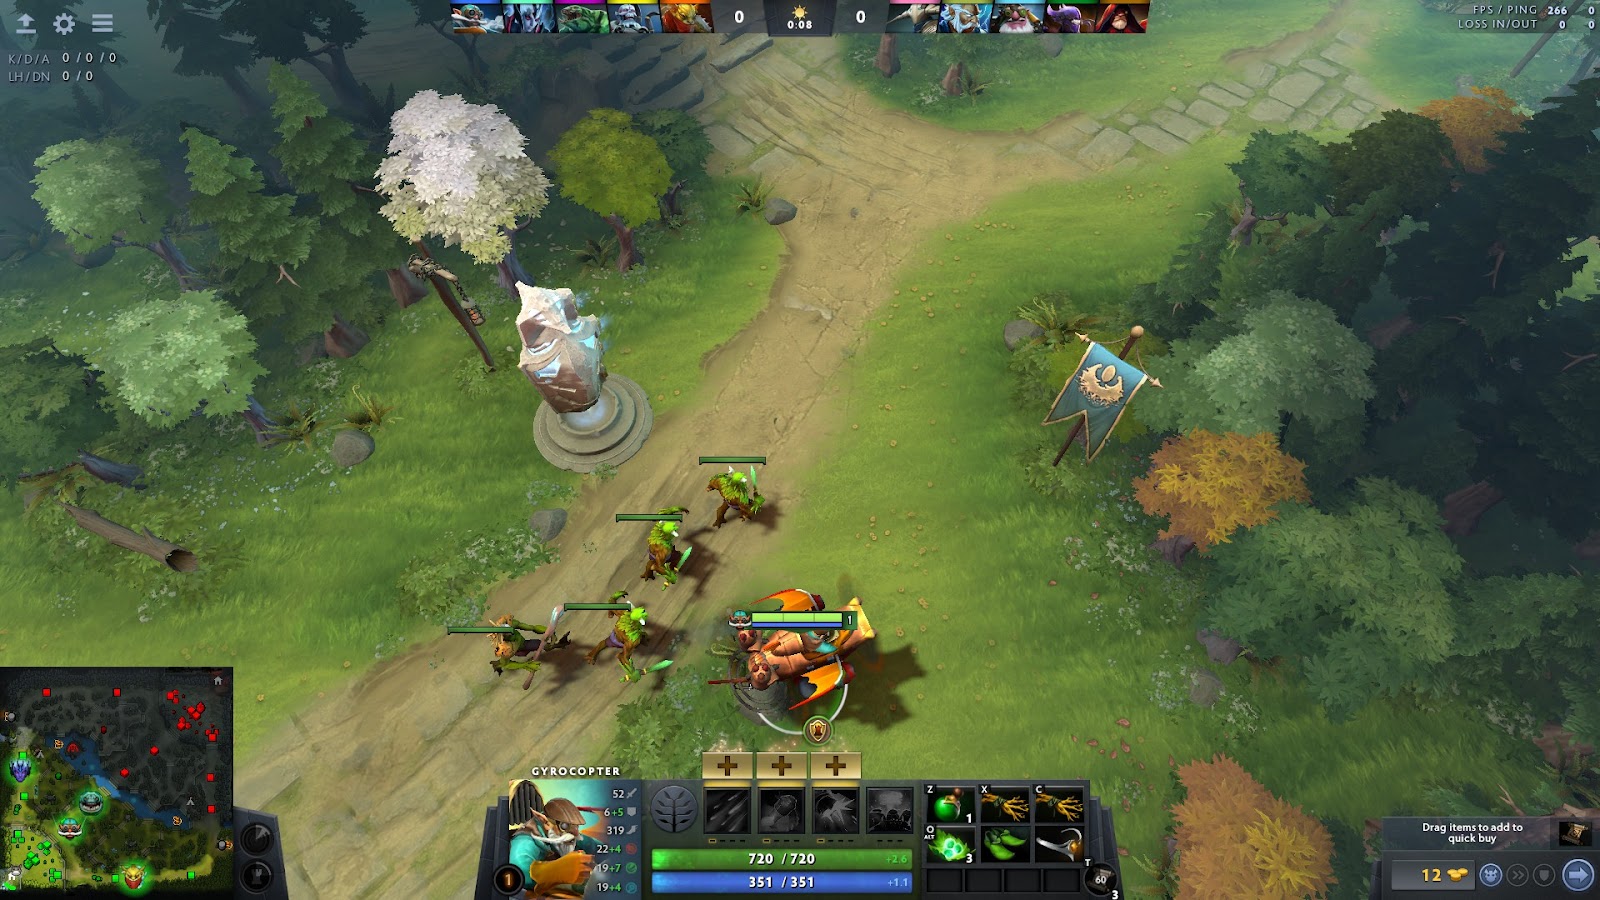
On the map, you will notice there are 3 lanes, with towers protecting the path. There are three tiers of towers- T1, T2, and T3. These towers have one job- to prevent enemies from reaching the home base. Enemy towers will fire projectiles at both heroes and creeps. What are creeps? They are waves of NPCs that spawn every 30 seconds in each lane, running towards the enemy ancient while attacking all enemy units in their path (including towers). During the early game when heroes are low level, creeps are relatively strong. Which is why you’ll see players taking cover behind their own creeps while last hitting and harassing the enemy in the lane. But heroes get stronger over time by collecting two main resources- Gold, and XP. You get gold by last hitting enemy creeps, killing enemy heroes, farming neutral camps, and destroying enemy towers.
Neutrals
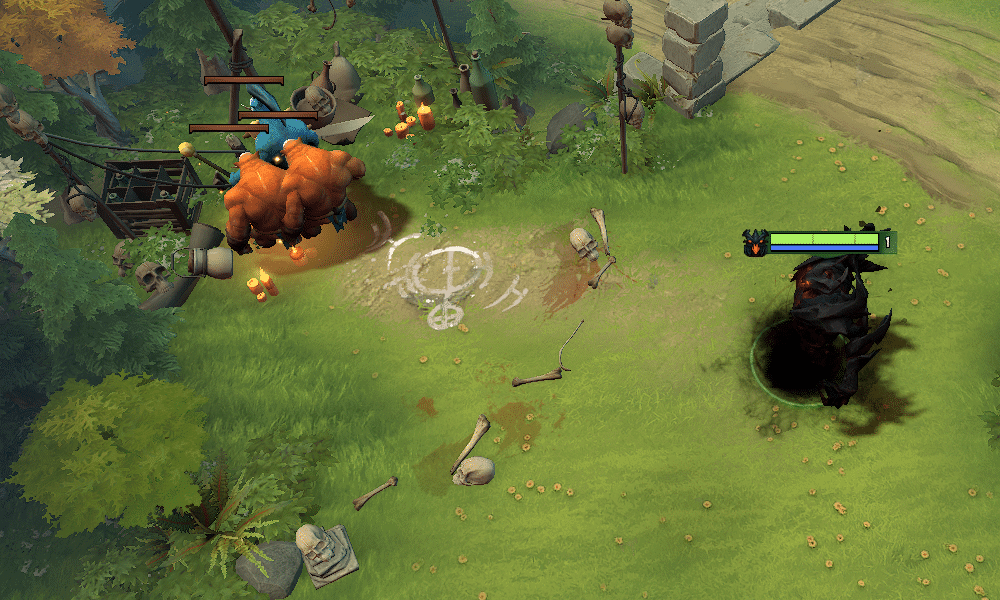
Neutral camps are located in the space between lanes, within areas that aren’t protected by towers. These uncharted areas are called “Jungles”. Since there is no friendly tower to provide vision, jungles are dark and placed in the “fog of war”. More on that later. Jungles allow you to traverse the map more easily, without having to walk into tower vision. They are also home to neutral creep camps. Neutral creeps have no allegiance to either faction, so both teams can contest these camps and kill the neutrals to gain gold and XP. Often, you’ll group up with a few heroes from your team and invade the enemy jungle where you’ll catch one of their heroes trying to farm neutral camps. That is called a “gank”, and this surprise attack nets you a kill resulting in a gold and XP boost for the team. While that enemy hero is dead, you can walk around the map threatening objectives such as towers since you know the enemy can’t retaliate at full strength.
When You Should Farm Neutrals
Neutrals are tougher to kill compared to lane creeps since they usually have more HP and damage (at least a lot of neutral creeps in the medium camps do). Besides, you don’t have any friendly creeps to tank the damage as you attack these neutrals. So you usually go jungling after you’ve reached a minimum level, or have certain items that increase your survivability and damage. Maybe something like a Morbid Mask for lifesteal, or Helm of the Dominator to control your very own neutral creep. There are heroes who have abilities that let them jungle much earlier compared to other heroes. Like Storm Spirit with his area of effect nuke, or Shadow Fiend who can hit neutrals after level 3.
It varies a lot from hero to hero, and the question you should really be asking is WHY not WHEN. Are you unable to farm lane? Do you want to give XP to your support by leaving lane and jungling? Or perhaps you anticipate an enemy gank? Some heroes even jungle level 1, although at higher tiers this is considered a form of greifing (intentional game ruining). Just because your hero can jungle level 1 doesn’t mean you should. Enigma with his eidolons can jungle at the start of the game, but it makes your other lanes weaker since the team is fighting 4 v 5 for like the first 10 or 12 minutes of the game. Normally, heroes switch between lane and jungle. They nuke out a creep wave, then rotate to a nearby jungle camp. By the time they are done with that neutral camp, the next creep wave shows up in the lane and they repeat the process.
Death And Respawning
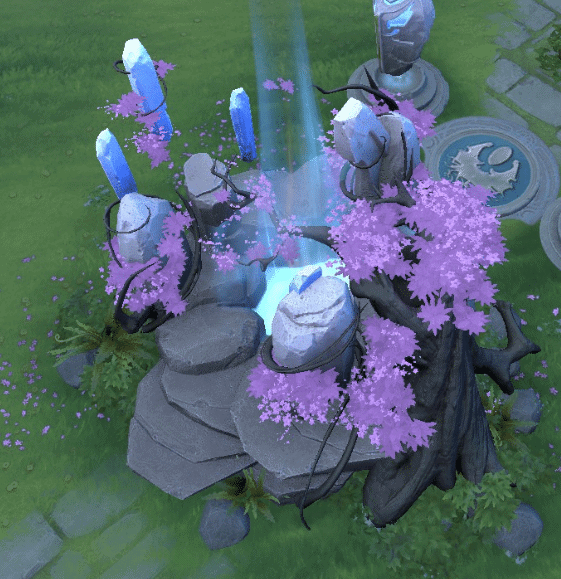
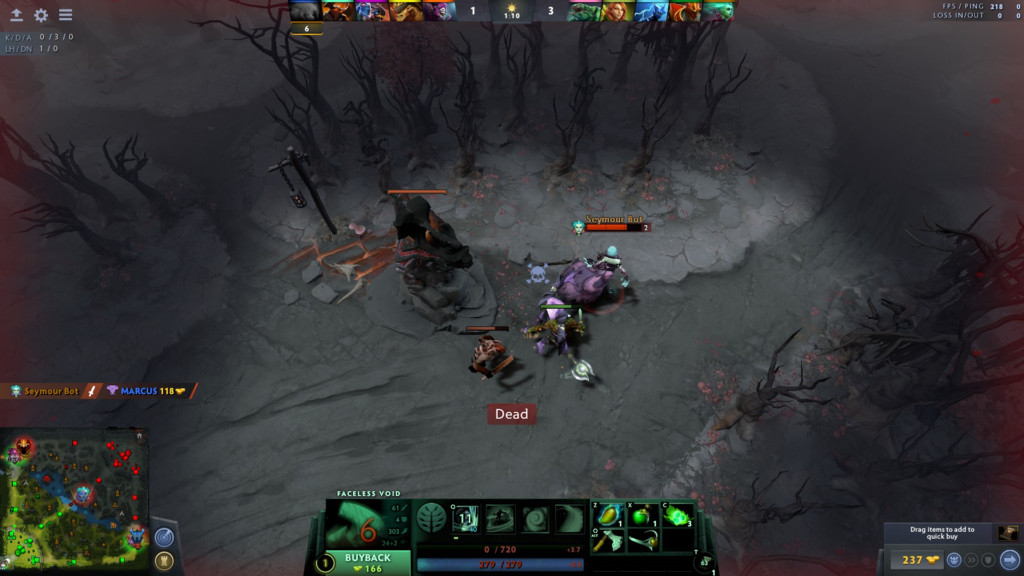
When a hero dies, it comes back to life after a certain period of time. The hero respawns in the fountain, with its health and mana pool reset. The higher level your hero is, the longer it will take to respawn. You’ll also lose some gold upon dying. Dota 2 has a feature called “buyback” which lets you spend gold to immediately respawn your hero, irrespective of how much time is left on your respawn timer. You typically use buyback when you need to defend your base or contest the enemy who is trying to take Roshan.
Using Gold And XP
Now, what do you do with your Gold and XP? Gold is used to purchase items from the shop, these items will provide your hero with certain unique benefits that make them stronger. There are 4 shops on the map- 2 fountain shops and 2 secret shops. The fountain shops are located within your home base, right where your hero spawns. And when you’re far away from the shop, you can use the “courier” to bring items.
Experience points (XP) are used to level up. Your hero starts the game at level 1, going all the way up to a max level of 30. Along the way, you’ll be able to put your XP points into “talents” from the talent tree. At higher levels, each increment in hero level requires a larger amount of XP which is why leveling up becomes harder the higher level you are.
Note: XP is obtained simply by standing in the nearby area when an enemy hero or creep dies, whereas gold is given only when you get the killing blow or “last hit” on an enemy unit/ neutral creep. The goal of Dota 2 is to keep getting stronger until you feel like you’ve got enough of an advantage over the enemy to walk into their base and take the Ancient. Yeah, the actual game is a lot more complicated. But this is the basic idea.
Objectives
The whole game is about controlling resources and making efficient trades. It is like those strategy games where you set up farms or factories in areas that are under your control, giving you a resource lead over your enemy. In Dota, that area is the map. You are fighting for gold and XP, as well as objectives. Objectives are the enemy buildings such as towers and barracks (buildings that spawn creeps). Come to think of it, you take objectives so you can get even more objectives. You get gold to buy items, so you can fight and farm even bigger items. Resources like Gold and XP can be considered a form of secondary objective since taking down enemy towers gives you more control over the map which leads to more Gold and XP.
Talking of objectives, there is a really big one located in the river towards the middle of the map. It’s a monster called Roshan who will drop the Aegis of Immortality upon dying. But to kill him you will often need the whole team, as he too strong for most heroes to 1v1. The Aegis when picked up by a hero, will grant them an extra life so they can respawn within a few seconds of dying at the exact same location. This comes in handy when you’re trying to push uphill into the enemy base, or taking a team fight. It turns a 5 v 5 into a 5 v 6, in favor of the team with Aegis.
Controlling Your Hero And Camera Movement
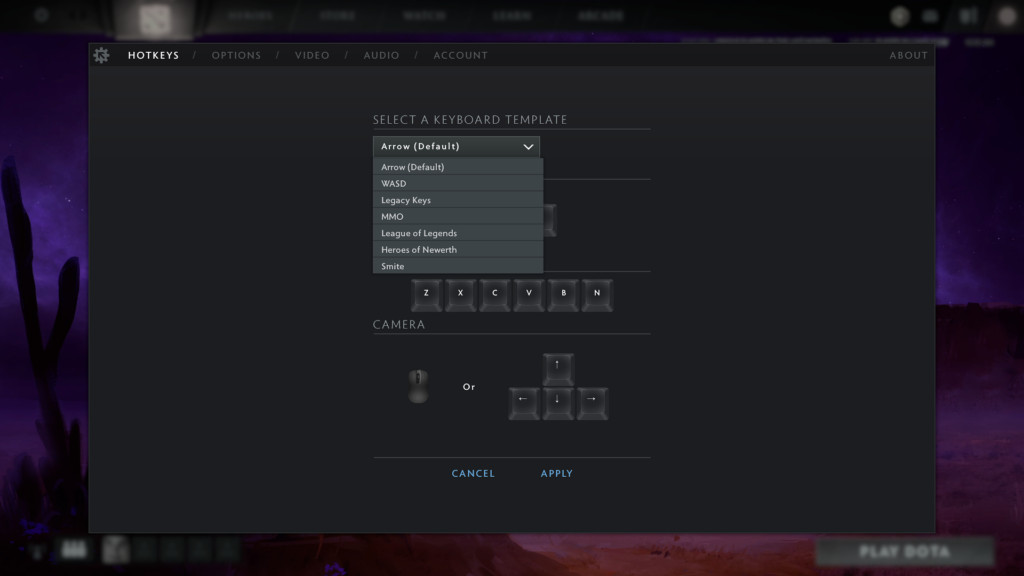
Dota 2 provides you with plenty of options when it comes to customizing hotkeys and the actions they perform. If you’re coming from another MOBA, you can choose one of the preset keyboard layouts. The settings menu can be accessed by clicking a little gear icon located in the top left of your screen when you open Dota 2.
Once you click on the little gear icon, you’ll be presented with the menu. It contains settings for hotkeys, gameplay options, video, and sound. The “account” tab isn’t important for new players since it is associated with the phone number that you enter in order to play ranked. And entering ranked matchmaking requires that you play a minimum of 100 hours in various unranked game modes. At the bottom left of the settings menu within the “hotkeys” tab, you’ll find a reset hotkey option that can be used to switch your key layout. It has presets for League, Heroes, and Smite.
Where Is My Hero?
Now, let’s talk about controlling the hero. First, you need to be able to locate your own hero. Open up the settings menu, and go to the hotkeys tab. Now, make sure that you’ve got a button assigned for “Select Hero”. By default, it is F1. Here is a screenshot of the settings I use-
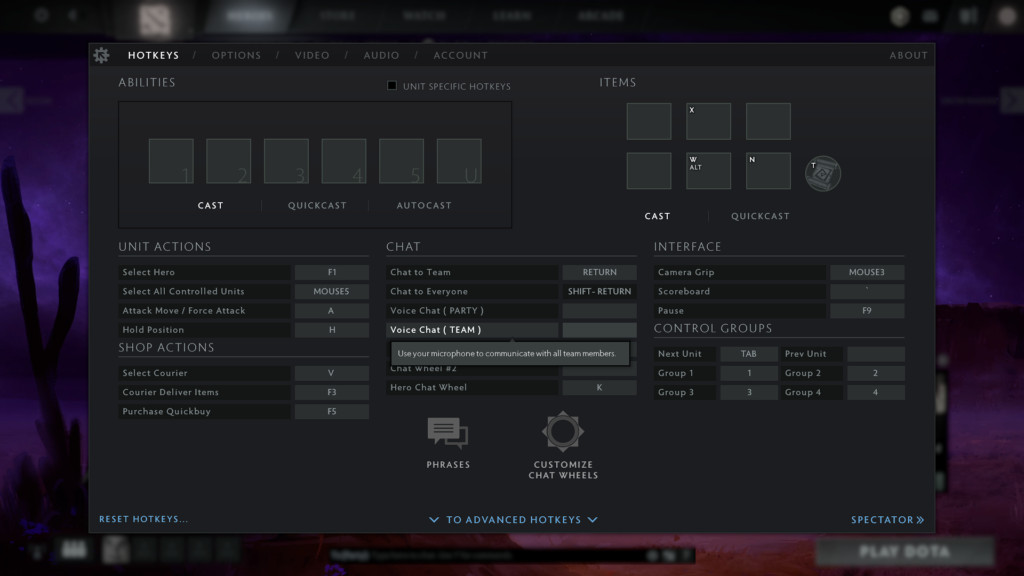
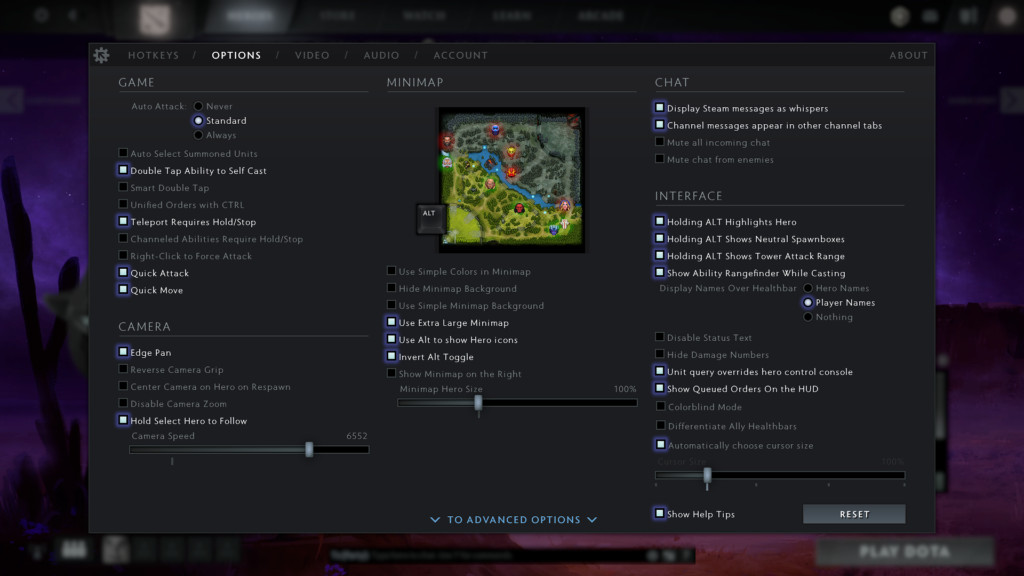
Press the select hero hotkey you’ve assigned once, to select your hero. If you’ve got your camera pointed at some other part of the map, this won’t bring it back to your hero. To select your hero, AND center the camera on top of your hero, double-tap the hotkey. For our example, I will assume you’re using F1. But you can assign any other button based on what feels most convenient. If you’re still facing troubles locating your own hero, enable the setting “Holding Alt Highlights Hero” in the interface section of the Options tab.

This setting will show a bright green beacon above your hero when you hold down the alt key.
Another way to locate your hero is by using the minimap- each hero within a match has its own unique color, as well as icon. We will discuss this in more detail within the UI section. For now, let’s talk about attacking and moving.
Moving Your Hero And Attacking Enemies
To move your hero, make sure you’ve got it selected. Then right-click the ground, specifying where you want your hero to move. This will issue a move command, and once your hero reaches the target location it will be issued a stop command to stop moving. You can also right-click the minimap to move your hero, this is used when you want to walk larger distances but moving the camera all the way there would be tedious.
The right-click can also be used to issue an attack command, say you right-click an enemy hero or creep instead of the ground. Your hero will then move until it gets in attack range, and start attacking the enemy unit. If the enemy units move, your hero will keep following it while trying to attack whenever in range.
Right-clicking an allied unit will issue what’s called a “follow” command. Your hero will now follow that allied hero/ creep until you right-click somewhere else or issue another action. You can also shift-queue move commands, i.e. issue make your hero move to different locations one after another. Do this by holding down shift as you press right-click. Shift queue can also be used to queue up actions, like going to an area and attacking nearby enemy units. You can also shift queue spells and items. If you’ve played strategy games before, you might be familiar with shift-queue.
Now let’s talk about left-click. Press the left mouse button on a unit to view its items, spells, stats, etc. You can check the health and mana pool of an enemy, as well as their items by left-clicking on them.
Left-click can also be used in combination with the “Attack Move” button to give your hero or controlled unit an attack move command. The default attack move hotkey is A. When you press A in combination with left click, you’ll highlight a location for your hero. Your hero will now start moving towards that location, and attack the closest enemy unit in range if it encounters any.
I recommend enabling “Quick Attack” and “Quick Move” in the options tab. This will reduce the time it takes for you to issue an attack move command since you just have to press A and the hero will move towards wherever you had your cursor while giving that command. It will attack the closest unit it finds on route to that waypoint. And you won’t have to left-click.
The stop command is an extremely useful function since it prevents you from attacking or moving. Basically, it cancels whatever previous command you made for the unit that you’ve selected. By default, it is allocated to the S key. You can find it in the advanced section of the hotkeys tab under “Cancel Current Action”. If you don’t have a button allocated to this command, I recommend you set one immediately.
Camera Control
Now that you’ve understood how to move your hero and attack enemy units, let’s talk about camera control. The camera in Dota 2 is slightly closer to the action when compared to the camera in League. And it is unlocked by default, so it won’t follow your hero around. We already explained how to switch the camera so that it’s centered on your hero. But what if you want to view a different lane, or analyze a team fight going on in a different section of the map? There are two primary methods used by Dota 2 players to control their camera.
The first one is edge panning, used when you need to move the camera in short to medium distances. You simply take your in-game pointer to the edge of the screen, and your camera will start panning towards that direction. Make sure the pointer is at the edge of the display as if it’s trying to move outside. And the option “Edge Pan” should be enabled within the settings menu.
The 2nd method is called screen dragging or “Camera Grip”. Go into the hotkey settings, and look for Camera Grip, it should be right under Interface. By default, it is mouse 3 or the middle mouse button. When you press the middle mouse, you’ll be able to drag the screen around. This is great for team fights and in the lane where edge panning simply takes too long, and you only need to move the camera short distances but with greater speed and precision. All good players use a combination of Edge Pan and Camera Grip. When you want to view a specific location on the map that is too far away from your current location, you left-click the minimap. Right-clicking the minimap will issue a move command to your hero, so be careful. You don’t want to accidentally run into the whole enemy team all by yourself.
Explaining The User Interface
Take a look at the following screenshot-
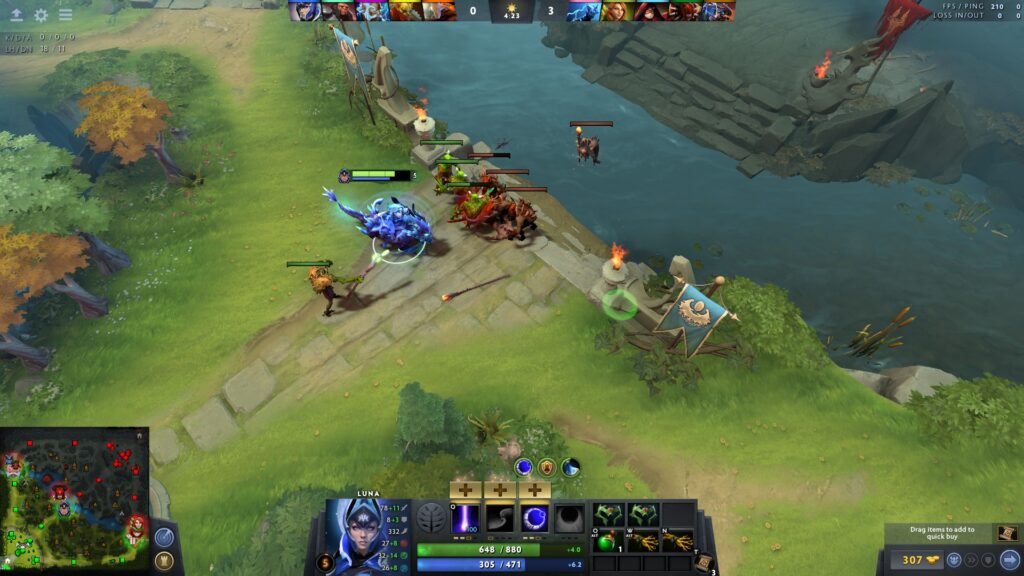
The User Interface consists of various elements that provide you with valuable data such as your current HP, mana pool, attributes, buffs/ debuffs, etc. Basically, everything except your main character and map can be called part of the UI. The HUD is one component of Dota 2’s UI. It consists of 3 main components- the Minimap, the Hero Info, and the Shop.
The minimap is located on the bottom left of your screen, although you can move it from the settings menu if you want. You can also change the minimap size, as well as the size of the icons displayed within the minimap.
Dota 2 players spend a large portion of their time looking at the minimap since it can warn you of incoming enemy ganks, and you also get to track the positions of your own teammates across the map. The minimap only shows enemy units that are in “vision”, i.e. enemy heroes or creeps that are under your own wards or towers. Or even enemy units that are in the vision range of your hero. You can’t see anything that’s in the fog of war, other than the geographical terrain of the Dota 2 map itself.
In the center, you have all the information for your hero. It will be replaced with the info for other units when you left-click them. The green bar you see underneath the spell icons is your HP bar. It gives you the total HP pool in numbers, as well as the percentage of HP which you can check with a quick glance. You can also see the HP regen rate of your hero at the end of the bar. When your HP hits zero, your hero dies (duh?). Same for the mana bar, i.e. the blue bar underneath the HP bar. Mana is used to cast spells and use items. There are certain spells and items which don’t require any mana, like passive spells or items. Whenever you cast a spell, it goes on cooldown. The cooldown timer is shown on the spell icon itself.
You can also see the mana cost of each spell on the bottom right side of the icon. When you don’t have sufficient mana to cast a spell, the icon will be grayed out. It will regain its original color as soon as you have enough mana. You’ll also get a prompt saying “not enough mana” when you try to cast a spell with low mana.
Another thing you can notice in that image is the little gold bars underneath each spell. Those tell you the level of the spell. You can upgrade the spells as you level up your hero, higher level spells provide benefits such as- shorter cooldowns, increased damage, more cast range, etc.
There are exceptions of course, like Invoker who has more than 4 skill points per spell. But that is advanced hero specific knowledge, and I will discuss it in a different article. Note that higher spell levels will usually increase the mana cost of said spell. Spells that aren’t skilled will be darkened, and inaccessible. Whenever you have a skill point available to spend on upgrading a spell, a gold + symbol will show up above the spell icons.
To the left of the spells, you can spot the talent tree. Hovering your mouse over the tree will show you all talent descriptions. You can choose talents every 5 levels, starting with level 10.
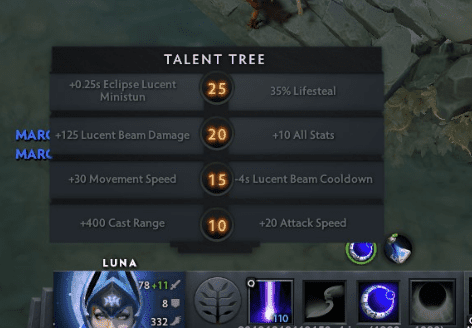
Talents give your hero unique benefits, like boosting the effectiveness of certain abilities that you have. Or they may even give you additional attributes. What are the attributes? Good thing you asked because that’s what we are about to discuss next.
Check out this image
All heroes in Dota 2 are divided between 3 different classes based on primary attributes- Agility, Strength, and Intelligence. These attributes are a mechanic that’s been carried over from the old Warcraft days.
Strength gives HP, health regen, and magic resistance. Agility gives attack speed, armor, and movement speed. Intelligence gives mana, mana regen, and spell amplification.
Strength heroes are tanky, capable of soaking up tons of damage. They are often used to frontline or initiate team fights. Agility heroes have medium HP pools, but high amounts of armor. This makes them very resistant to physical attack damage. They also have high amounts of attack damage coupled with good attack speed, making them scale very well into the late game with items. Intelligence heroes are the spell users who typically sit in the backlines, spamming things like AOE nukes and stuns/ slows. They have low HP and armor which makes them squishy, but most of them are ranged to compensate for this weakness.
A strength hero will gain more from each point of strength compared to an agility or int hero. Similarly, an intelligence hero will get more mana and spell amp from each point of intelligence compared to a strength hero.
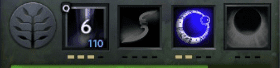
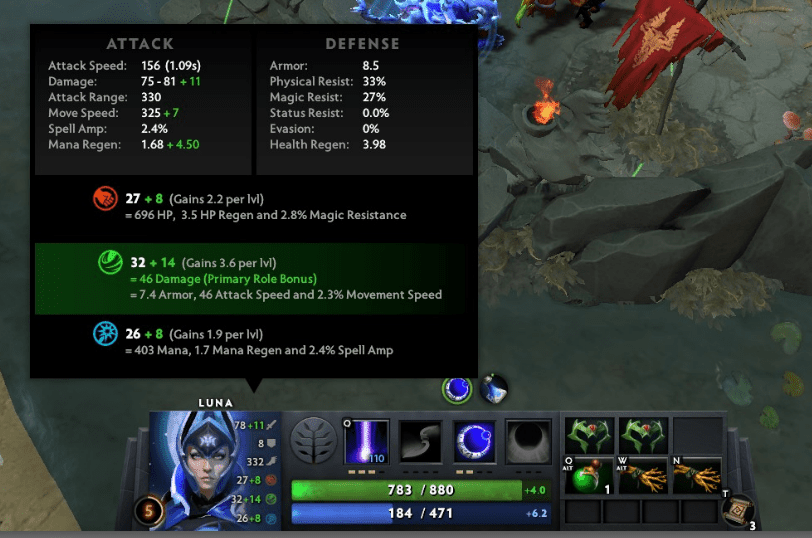
In the hero portrait, you can see a bunch of numbers next to the character.
The circle with a yellow border around it gives you your hero’s level and also tells you how far they are from hitting the next level. By holding down the alt key, you will get the XP numbers. At the top right, you can see a white sword. This is the average physical attack damage of your hero, every time you right-click an enemy or neutral this damage number is applied (before reductions from armor). Notice I said “average”, because there is such a thing as damage variance. Look up the previous image (Luna) and you’ll see that the damage is anywhere between 75 to 81, resulting in average damage of 78 which is the number displayed next to your hero portrait.
Below the sword icon, you can see a shield. This tells you how much armor your hero has, more armor gives you more resistance to physical damage. You can see the percentage of incoming physical damage your hero is resisting by hovering over the numbers.
Next, there is the wings icon which denotes movement speed. Most heroes have a base movement speed between 280 and 320 which you can increase by purchasing boots. When you are slowed down by an enemy spell, the change in movement speed will be reflected in this number.
And finally, you have the three attributes- strength, agility, intelligence. The white numbers are your hero’s base attributes. Any attributes or “stats” that you gain from items are displayed in green. Same for damage, the white damage number is your base damage. Raw damage obtained from items is shown in green.
The Shop
When you click on the gold coin icon at the bottom right of your HUD, you’ll open the shop. Here you can choose from two sections of items- basic, and upgrades. Basic items are cheap and cost-effective, these are what you purchase with your early game gold. Upgrades are made by combining multiple basic items, resulting in an item that provides a sum of the benefits from its constituents along with some unique benefits.
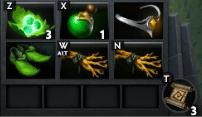
This is your hero’s inventory: 6 equipped items + 4 “backpack” slots and a TP scroll slot
There are two types of shops- the one you have in your fountain, and another which is located nearby the river on the top lane. The latter is called a secret shop, and it sells components that you can’t buy at the regular shop. You’ll need components from the secret shop to make some really powerful upgraded items. How to know if an item is only available at the secret shop? Look at the bottom right of its icon, there should be a little red inverted V. You’ll also see a little area above the shop and courier icons, it is the quick buy section. Here, you can drag and drop items from the shop that you plan to purchase in the near future. As soon as you’ve got enough gold, you’ll be notified and can instantly purchase the item without having to open the shop (default quick buy purchase hotkey is F5). Also, I recommend you set a shop hotkey. This will save time and make it so that you don’t have to move your pointer to the shop icon every time you need to open it.
Always make sure you’ve got at least one TP scroll. TP is short for teleportation, and a single scroll costs 50 gold. With this scroll, your hero can teleport to any friendly building. This is often used for escaping enemy ganks or to quickly form a defense alongside multiple friendly heroes when the enemy is trying to take one of your towers. It is much quicker to TP over to the other side of the map, instead of walking all the way. And remember- you can only TP on friendly buildings.
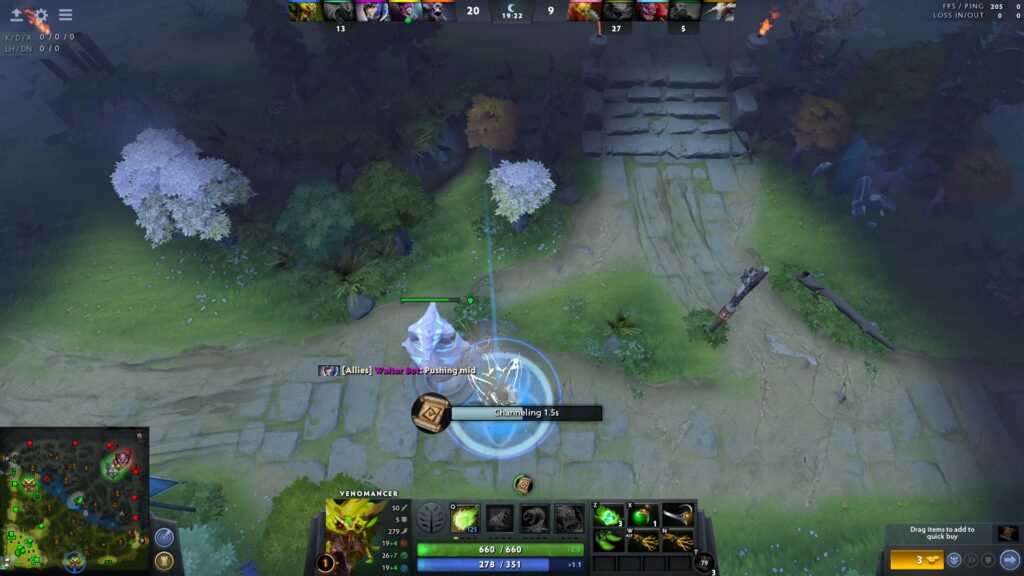
TP is a channeled spell, notice how Venomancer is teleporting to this tower from the top half of the map
Courier
Often you won’t be anywhere near the shop to actually put the purchased items in your hero’s inventory. So you can fly out the items using courier hotkeys, everyone has their own personal courier that spawns at the start of the game.

As you can see, the courier has its own inventory slot and abilities
The courier levels up over the course of the game, and gains unique abilities of its own- a short movement speed burst, temporary invulnerability, etc. Check out the courier hotkeys in the settings menu. F3 should be the default for getting your items delivered to you. If you can’t go to the secret shop yourself, you can select the courier and fly it over to the shop for you. It too can purchase items.
Itemization
Everybody receives precisely 600 Gold at the start of the game, which can be used to purchase certain items. I recommend you follow the default itemization guide provided to you by the game until you gain enough experience to adapt your itemization according to your playstyle. At the start of the game, buy tangoes and healing salves. And small stat items like circlet, slippers of agility, etc. depending on the primary attribute of your hero. Never save up a ton of gold early on to buy some really expensive tier 1 item. The thing about cheap stat items is that they are very cost-efficient for what they provide. For example- a gauntlet of strength gives you + strength at the cost of just 145 gold. A Heart of Tarrasque gives +45 strength but costs 5200 gold. With the gauntlet, you’re spending 48.33 gold per point in strength. With the Heart, you’re spending 115.55 gold per point in strength. The reason I get tier 1 items, later on, is because of their slot efficient nature. You can’t equip 15 gauntlets since you have only 6 inventory slots.
One very important thing to consider is efficiency. You want to stay on the map for as long as possible, without returning to base whenever you’re low on health and mana. Which is why clarities and salves are so important. These relatively inexpensive items will keep you on the battlefield, so you can acquire more gold and XP with your time. In the early game, purchase Bracer on strength heroes, Wraith Band on agility heroes, and Null Talisman on intelligence heroes.
Look out for stat items, which provide you with more of your hero’s primary attribute while also increasing your attack damage so you can easily secure last hits in the lane. Purchasing a magic stick will help you sustain yourself against heroes who harass with spells. Every time the enemy uses a spell, your magic stick gains one charge. Each charge replenishes a small amount of health and mana.
Also, makes sure you purchase boots. Brown boots are the most basic type of boots, providing your hero a flat move speed boost. Power treads are extremely versatile- they provide +10 of any attribute you choose, while also giving bonus attack speed which helps in fighting and farming. Tranquil boots regenerate health at an accelerated rate whenever you aren’t taking damage. Phase boots give you bonus damage and a short burst of speed which also makes you walk through units as if you were a ghost. Boots of Travel are the costliest, and a late-game purchase for the most part. These give you the highest move speed boost compared to any other boot. They function like TP scrolls, except the TP feature is built-in and you can also teleport on friendly creeps. Plus, the cooldown on Boots of Travel is much shorter compared to a TP scroll, so you can move around the map faster.
Itemization in the mid and late-game comes down to what your hero needs, how the game is going, and a myriad of other factors. If you feel like the enemy has too many escape abilities that make them hard to catch, build something like a Rod of Atos or Orchid Malevolence. Scythe of Vyse is going to turn your opponent into a harmless pig for a few seconds. If your team lacks initiation, you build a blink dagger which is a short-range teleport that gets disabled if you take player damage. Want to control runes? Get a bottle. And buy observer wards to maintain vision on the map. That way you can see where your enemies are, what they are doing, and plan your movements accordingly.
How To Level Up Your Skill Points
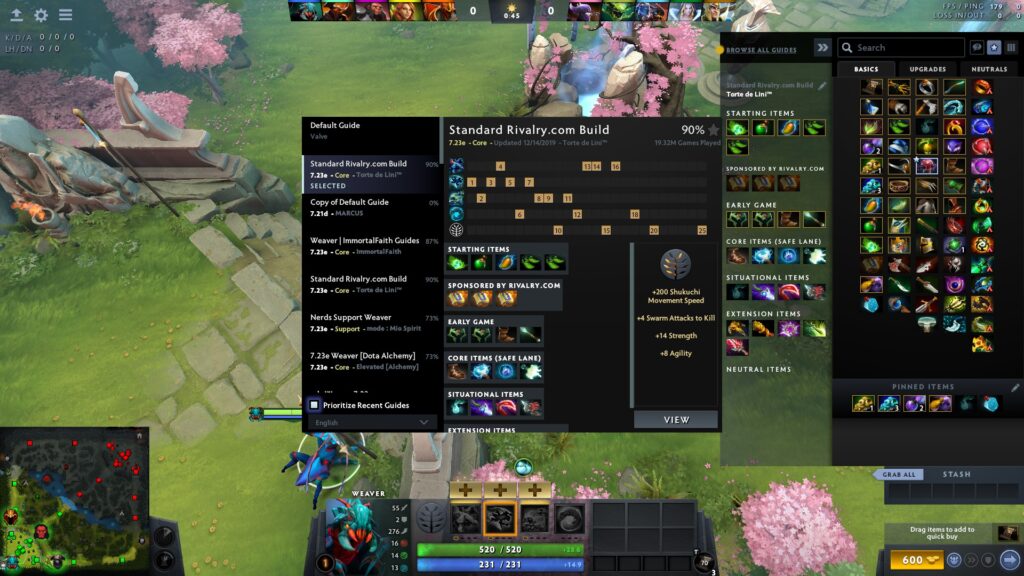
Once again, I recommend you follow the default skill build guides provided within the game. You can access these guides by opening up the shop and selecting “browse all guides”.
While leveling up skills, you typically focus on the ones that provide an increase in damage. Skills that help you clear creep waves, nuke down enemy heroes, or farm faster- these are the ones that provide your hero with a power spike. Often times you’ll come across skills that don’t change a whole lot when you level them up.
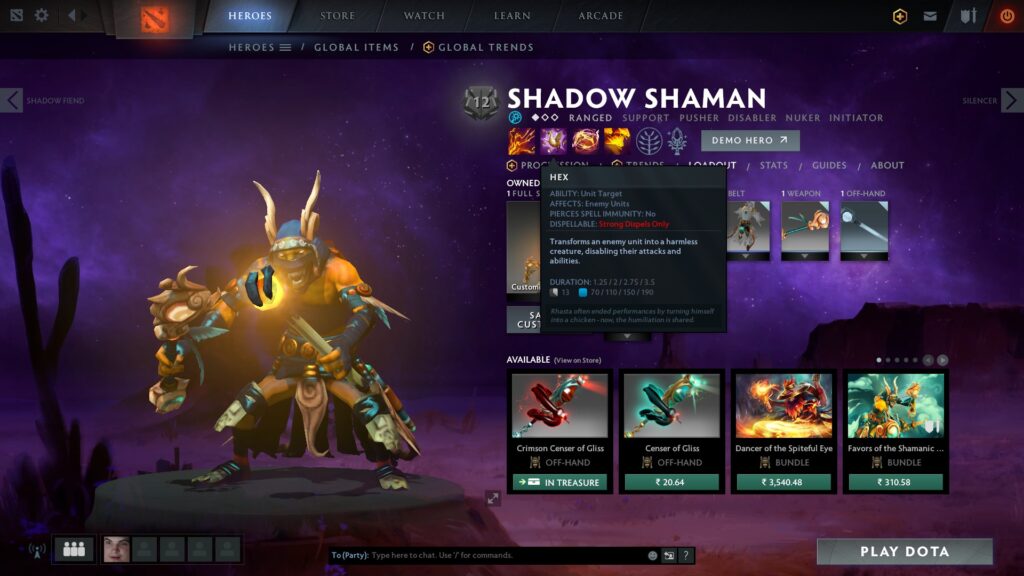
For instance, Shadow Shaman’s hex which turns enemies into harmless critters has a constant cooldown at all levels. What increases, is the hex duration. But note that the mana cost also increases significantly. So you typically put only one point into this skill and upgrade your first and 3rd skills instead. Then when you’ve maxed out the other two, you start putting points into hex.
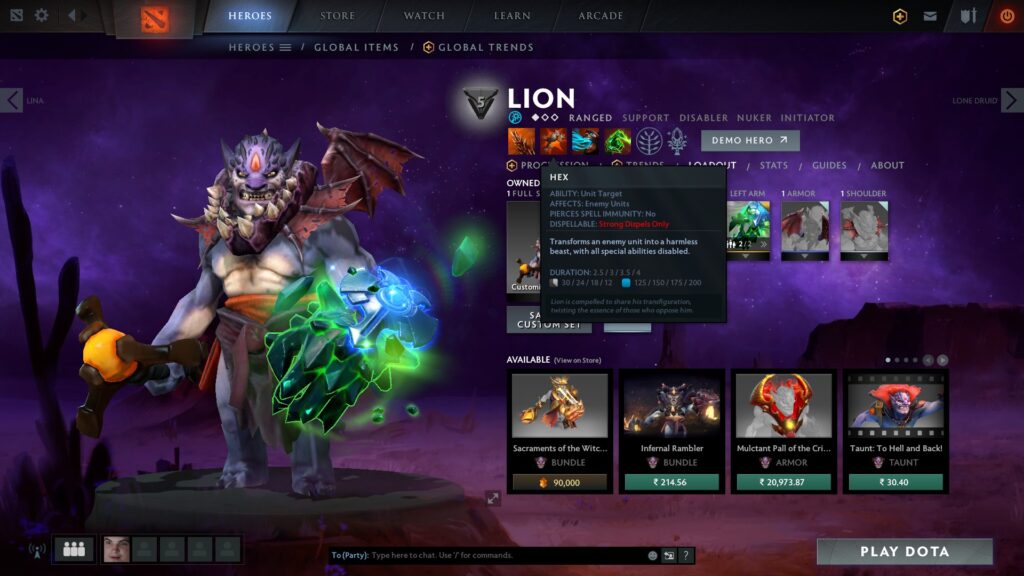
On the contrary, Lion who also has a similar ability with the exact same name benefits quite a bit from leveling it up. The skill starts out with a 30s cooldown at level 1, which goes down to just 12s by level 4. Also, you can actually start with a hex at level 1 on Lion since it lasts for 2.5 seconds. But Shadow Shaman is better off getting either shackles or Ether Shock since his level 1 hex duration is so low.
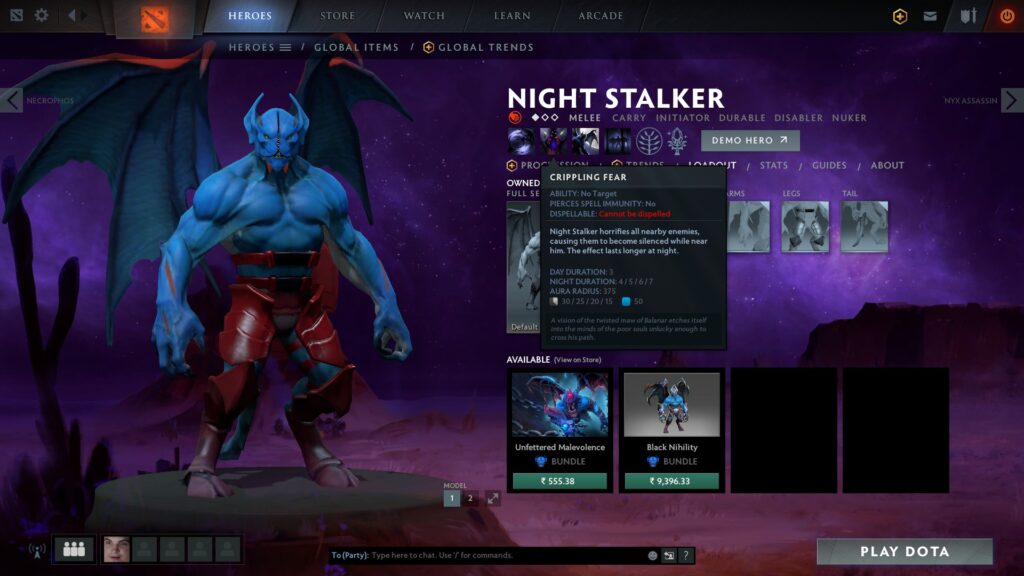
Another example of heroes with skills that don’t change much when leveled up is night stalker with his crippling fear, which is an area of effect silence. It prevents enemies within the area of effect from casting any spells. Both the duration during daytime as well as the radius of effect stay the same at all levels. So you get one value point in this ability at level 3 or 4, and max out your first skill and 3rd skill instead.
Before leveling up a spell, read its description to see what it does. What do you gain from each level? Some spells gain a lot by going from level 1 to level 2, but the level 3 upgrade is mediocre. So you get the “value point” at level 2 and leave it, focusing on other skills instead. Typically, the mana cost for skills goes up with each level and most heroes have very small mana pools early on. So take that into consideration before you put a bunch of points into mana hungry skills because you might not even be able to use them.
Types of Damage
For starters, there are 3 basic types of damage in Dota 2- physical, magical, and pure. Physical damage is the damage done by right-clicks, or basic attacks (some spells deal physical damage too, like Alchemist’s Acid Spray). It is blocked by armor. Magical damage is the type of damage that is dealt with spells, and every hero has innate magical resistance built-in (typically a base resistance of 25%). You can purchase items like Cloak and Pipe to increase your hero’s resistance to magical damage. Finally, there is pure damage. Pure damage does the exact amount of damage that it says in the spell description, there are no reductions. Some pure damage spells like Bloodseeker’s Rupture go through spell immunity. Others like Timbersaw’s Chakram cannot affect units who are spell immune. More on spell immunity later. Dota 2 also has damage over time spells, which affect you over a period of time dealing ticks of damage at fixed intervals. Check out Dota 2 Gamepedia’s Mechanics page for more info on damage types.
Armor and Magic Resistance
Armor reduces the amount of physical damage you take from basic attacks; this is extremely useful against agility carries who rely on items to increase their raw damage and attack speed. Armor provides diminishing returns as you go higher, so excessively high amounts of armor aren’t worth the gold spent. A good combination of armor and HP will make your hero very tanky. Magic resistance reduces the spell damage that you take. It is worth noting that Dota 2 has items and spells which amplify physical and magical damage by reducing your armor or magic resistance. Take Vengeful Spirit’s Wave of Terror for example, at the max level it can reduce the target’s armor by up to 6 points which significantly increases the effectiveness of her team’s physical damage output. The intelligence hero Pugna has a spell called Decrepify which causes affected enemies to take bonus magical damage (up to 60% more). Learn more about how armor works here.
The Importance of Vision
Dota 2 is a game of intel, the more information you have on the enemy, the easier it becomes to win. There are mechanics like the high-ground fog of war, which means you can’t see anything located on a higher plane than yours unless you have some friendly unit standing on the high ground to provide vision. Trees create wedges of no-vision zones, which makes the jungle a dangerous place to venture alone. There could be 5 enemies standing right behind you, under the cover of trees, and you wouldn’t even know it.
Most units have higher vision during the daytime, compared to night vision. Vision is generated in a circular radius around friendly units. Anything that one friendly sees, the rest of the team can see as well. Most heroes have 1800 day vision, which is reduced to just 800 in the night. Day-night cycles are an important part of Dota 2, you always start at 0:00 with daytime. The first nightfall happens at precisely 5:00 minutes in, and the next daytime starts at 10:00. Day and night alternate every 5 minutes, so it is important to keep one eye on the clock at the top of the game. There will be a sun or a moon depending on what time of day it is, and you’ll know it’s night by the change in vision and color tone.
Certain abilities like Nightstalker’s Dark Ascension will temporarily create night. Luna’s ultimate Lunar Eclipse does the same. Phoenix’s Supernova will create daylight over the whole map for a few seconds when cast.
We talked about the fact that most heroes have less vision during the night. There are exceptions, of course. Nightstalker actually loves nighttime, since the vision game is reversed for him. He can only see 800 units away at daytime and gains full 1800 units of vision at night which allows him to stalk enemies who can’t even see him approaching.
Detecting Invisible Units
You have to deal with invisible units like Riki, Bounty Hunter, Clinkz, etc. They sneak up on you, and you can’t see them at all until it’s too late. Weak supports and squishy ranged heroes with limited mobility are their favorite prey. There are two ways to deal with them- sentry wards, and dust of appearance. Sentry wards act as an area denial system for invisible units, so place them preemptively if you’re venturing into enemy territory. Like when you’re taking an enemy tower, their Riki might by trying to flank you from the sides. Place a sentry so you can initiate on him before he gets the jump on you.
Dust of appearance has a different effect; it releases a cloud of magical dust in a 1000 unit radius that latches onto all invisible units and makes them visible for a short period of time while also slowing them down. Even if they move out of the original area, they will remain visible until the debuff duration ends. Sentry wards stay for several minutes but only cover a fixed area.
Warding
Wards are an important part of Dota 2, you place them in key locations to gain vision over enemy movements. There are different spots on the map where you can place wards, but don’t put them in obvious locations where they might get destroyed. There are different warding patterns for when your team is ahead when you are even, and when you are behind the enemy. When ahead, you place aggressive wards deep within the enemy territory since you plan to invade their area. When even, you place wards around specific parts of the map that you need to control. When behind, you place defensive wards within your own jungles since you’ve probably lost a few towers and don’t see very much of what’s going on outside the base.
Forming a Logical Thought Process
Perhaps the most important thing I can teach you in this guide. Dota 2 requires plenty of patience and an open mind. Know that failure is inevitable when you initially start out. But always have a reason behind every decision you make, no matter how big or small the consequence of that decision. It doesn’t matter if your reasoning is right or wrong, everyone starts at the bottom. So don’t pressure yourself to make the right choices every time. Instead, ask “why am I doing this”.
Create a gameplan before you enter the game. Practice a small pool of heroes at the start, and understand the nuances of a specific hero. Once you’re comfortable with pressing your buttons and using spells, you can start thinking about the game.
Don’t be afraid to think about the small stuff, which might seem really silly and basic. The most complex decisions often originate from the most basic concepts. Here’s a guide from a 6k player, it is 2 years old but explains the process of logical thinking within Dota 2 very well. The key to being successful in Dota 2 is breaking up everything into objectives.
Dota 2’s final goal is killing the enemy ancient, but how do you get there? Take a large problem, and break it down into smaller chunks. Okay, I need to get this tier 1 tower first. How do I get there? I need to level up and buy items. How do I do that? I need to farm creeps in the lane. How do I do that? I harass the enemy in the lane or kill them, so they don’t interrupt my farming. Are they not interrupting my farming? In that case, I don’t have to be aggressive on them, I don’t have to kill them. I will just focus on my farm and XP. Where do I go once I’ve taken this tower? Do I take the next tower? Or do I fall back into the jungle and farm this item? Make these decisions at least 30 seconds before you actually execute them. That way, you’ll optimize your thought process and always have a clear idea of what to do in each game.
Pre-Game Prep Work
I almost forgot to mention this- Open Dota 2 and go into the Learn tab, then select “Last Hit Trainer”. Practice 5 minutes of the last hitting creeps before you search for a match. Always practice with the hero you plan on playing. Actual last hitting will be slightly harder, since you’re going to have network delay and an opponent who’s actively trying to harass you. But any training is good. Build normal items, like you, would in an actual game. Also, it’s a good idea to open up Youtube and watch clips of better players playing the hero you’re interested in. Dotabuff is your friend, use it to track high skill players. Observe how they position their hero in lanes, how they itemize, which skills they learn, etc. Make a list of things you want to get better at. Last hitting, itemization, skill builds positioning, etc. Focus on only one thing at a time. Once you’re satisfied with your progress in that aspect of Dota 2, move on to the next goal. If you’re trying to improve at Dota, it is necessary to take a pragmatic approach. Someone who just sits down and presses their buttons each day for 2 years in a row will gain less MMR than someone who actually thinks about the game for a few months.
Conclusion
Practice, practice, and practice some more. Watch tutorial videos, we have content creators out there who do a fantastic job of explaining the basics to beginners. There are some things that cannot be covered fully in written format, so I highly recommend that you check out the Dota Basics series by Purge. The Dota 2 community is just as helpful and cooperative as it is toxic. For every bad guy that you have to mute, there is a good guy willing to help you understand the concepts of this game. Go on the Dota 2 subreddit, asks questions and make some friends. Dota 2 is best enjoyed with others, solo queuing as a newbie is an absolutely awful experience. Go make some buddies, there are Discord channels and communities geared towards creating a nice experience for new players. Once you’ve gained a decent understanding of the game (which will take several months), you can visit sites like Game-leap.com to get advanced tutorials. Or watch Dota 2 streamers on Twitch, my personal favorites are BananaSlamJamma and Khezzu. Want to know how Dota 2 revolutionized the esports industry? Check out Free to Play. So what are you waiting for, now is the perfect time to download Dota 2 and play some matches. There’s a brand new patch, nobody knows what’s going on, everyone is figuring stuff out. So get in, and play some games.

Thank you for having the time and effort on sharing this amazing blog with us! I’ll probably read more of your articles.
No problem 🙂
Stay tuned!