
Gaming videos have been the staple of Youtube since its inception, and if you’re a gamer you’ve probably thought of uploading your own gaming content like Pewdiepie or Markiplier. Or perhaps you already have a Twitch/ Mixer stream and are looking to upload highlights and funny clips to your Youtube channel. Wondering which editing software to use? I have created a list of some really powerful video editing tools which are absolutely free and easy to learn for beginners who aren’t too experienced with video editing. And when I say “free”, I mean it. No watermarks or limited-time trial offers here. Yeah, a lot of these programs have paid or “Pro” versions too, which offer additional features for advanced users and professionals. But for 90% of you reading this article, the free editions should have more than enough punch to tackle whatever you throw at them. So let’s get started.
Hitfilm Express
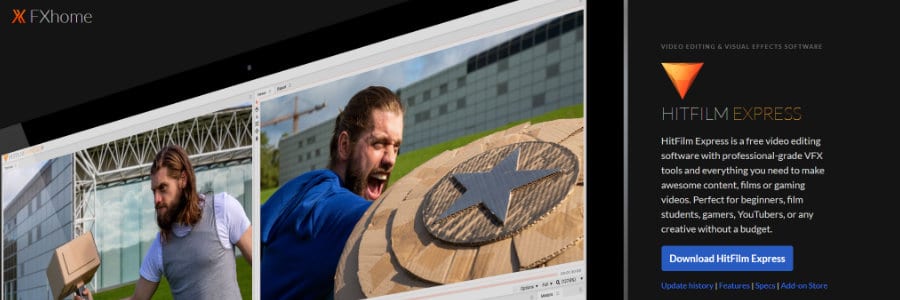
Robust, powerful, and completely free- Hitfilm Express performs the role of both editor and compositor, within a single program. Plus, as long as your computer can handle it, you can stack an infinite number of audio and video tracks on top of each other. The VFX abilities of this program are really good when compared to its competitors. Most video editors lock their good stuff behind a paywall, but Hitfilm Express gives you access to some really neat special effects for free. Hitfilm Express also supports advanced keyframing and animation, something that’s usually absent from other free video editing software. You can create keyframes, adjust special and temporal interpolation, and there’s a value graph.
Pretty amazing so far, right? But it keeps getting better, Hitfilm Express even supports motion tracking. There is both single and double point tracking with a high degree of accuracy. It can be used to attach objects or stabilize your video. For gamers, this software packs over 500 special effects that you can use to spice up your gaming videos. There are 3D effects like fire and explosion, color grading tools (levels histogram and curves), shake effects, light flares, color grade presets, etc. You can insert lightning, edgy memes, 3D text, and you can even create lightsabers. Hitfilm Express also allows you to work with 4k video, and you can export in a multitude of video formats. The interface is relatively easy to learn, it barely takes a couple of days to get up to speed on the basics of this software. And it performs way better than something like Sony Vegas on a low-end PC.
Hitfilm Express is also highly customizable. You can switch and swap UI elements, add or remove stuff based on your preferences, and edit the keyboard shortcuts. And then, there’s the RAM preview mode which lets you view certain parts of your composites in full detail without waiting for the video to export. Hitfilm also has an export queue that allows you to export multiple video projects in a sequence, without having to restart the queue every time you close and reopen the application. If you want to learn Hitfilm, their website has a bunch of free tutorials that cover all the basics and tell you how to use the most popular special effects. Now, this software does have its downsides. For instance, you need a relatively powerful system to use more advanced effects without slowing down. And, it does crash occasionally (that’s something Premiere Pro also loves to do these days). But your project will be auto-recovered if you forgot to save it.
Kdenlive
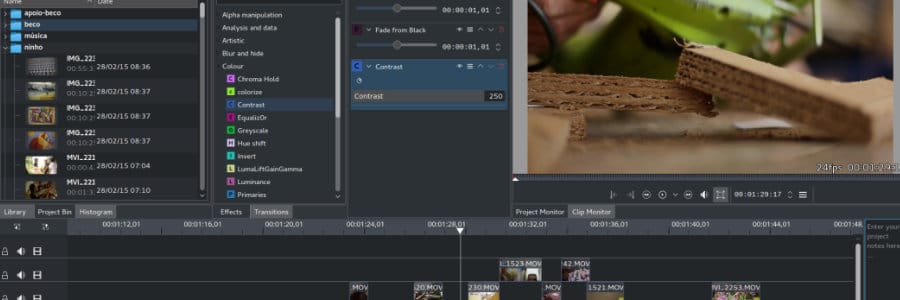
A great alternative to OpenShot, Kdenlive (KDE non-linear video editor) packs more features and feels more flexible. It also performs better when you start inserting a bunch of complex effects into your video clips. And talking of performance, Kdenlive has a feature called proxy clips which makes it much easier to edit 4K footage. Not just 4K in particular, proxy clips speeds up editing and previewing in general. Proxies are basically copies of your original media, but with reduced image quality and hence reduced size. The original file is replaced with a proxy, which itself uses a less complex codec that reduces computational requirements so the load on your CPU is greatly reduced when compared to something like encoding in H.264. This ensures seamless playback, even on low-end PCs.
One thing I would like to mention while comparing Kdenlive vs OpenShot is the learning curve. This program is slightly harder to work with during the first few days, due to its more complex nature. But once you master the interface and learn about all the tools (there are tutorial videos online), you’ll be able to produce professional-grade content with relative ease. This editing software is based on the MLT framework, Qt, and KDE. It’s absolutely free for Windows, Mac, FreeBSD, and the source code is freely available under the rules of the GNU general public license. Certain features are the highlight of Kdenlive- an unlimited number of videos and tracks are supported in batch mode, and the multi-track editing is truly next level. You’ll also find an extremely wide range of transitions and video effects packed into the program, with multiple choices for things like distortion, rotations, color adjustment, blue-screen, masking, etc.
In audio effects, there are options for modifying phase and pitch. You also get volume adjustment, normalization, equalization, reverb filters, etc. Creating custom effects and transitions is a breeze, plus the rendering speed is pretty fast. The UI is divided into four sections- a menu, a project tree (contains video clips, images, audio tracks, etc.), an effects section, and a view section where you can monitor the edits in real-time. The interface is fully customizable and modular, with easy drag & drop modifications possible on the fly. You can also remap the keyboard shortcuts according to your liking.
Shotcut
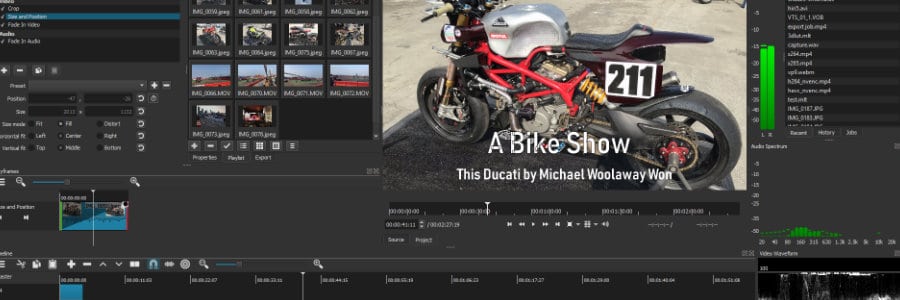
An excellent choice for anyone who’s just starting with video editing, although it isn’t as advanced as something like Adobe Premiere Pro which has a lot more effects and way better color grading. But this is about as good as it gets if you’re looking for a video editing software that’s free, open-source, and cross-platform. No annoying watermarks on your finished projects and it supports dozens of popular codecs + video/ audio formats. Shotcut is still receiving updates, and the last one arrived in February of this year. This new update introduced a low-resolution preview scaling system which should improve performance on most hardware, and it also includes new transition effects along with an audio pitch filter (as well as various bug fixes).
I highly recommend this program to people with low to mid-range PCs who are starting gaming channels on Youtube. You can use it to quickly whip up a highlight montage, or gameplay commentary video. It is incredibly powerful for free editing software, supports a ton of resolutions and export formats, and you can capture from SDI, HDMI, webcam, IP stream, etc. While the interface isn’t as intuitive as professional video editing programs, it is still pretty easy to navigate. You’ve got a modular design in which panels can be easily docked and undocked depending on your preferences. Media properties are displayed comprehensively, the recent files function is pretty neat, you get a thumbnail view for the playlist, and much more. Assets can be quickly added to your work area via drag & drop, and you don’t have to import stuff since Shotcut supports native editing.
Shotcut lacks certain screen transitions and effects that you’ll find in more advanced programs, and it still can’t edit 8K footage (not that it matters for small-scale editors). Documentation is somewhat scarce, although you’ll easily find video tutorials for Shotcut. You also miss out on features like motion tracking, 360-degree VR, and there’s no Multicam tool to easily swap between camera angles. But most of these features are intended for professional editors and owners of larger Youtube channels. You do get a bunch of output options though- Apple ProRes, HDV, Flash, H.264, OGG Vorbis, WebM, WMV, etc. Also. managing 4k footage is easy because it supports excellent compression through H.265 export.
Davinci Resolve

There are two versions of this software that you need to check out Free and Studio. The latter is paid and comes with a suite of additional features for heavy-duty users. For instance, the Studio edition comes with an AI engine that assists with tasks such as object removal, facial recognition, auto color matching, etc. Another thing missing from the Free version is a higher limit on the maximum timeline resolution. With the paid version, you can import high-resolution 8K or Cinema 4K footage/ photos and add them to your timeline. The Free version also lets you import content with a resolution greater than UHD, but you cannot work with them on your timeline.
Another thing missing from the free version is 10-bit color space, you are limited to 8-bit color space. It’s fine for most users who are reading this article because you most likely own a camera that shoots in 8-bit color. If you own a Panasonic Lumix GH5S or Fujifilm X-T3, you might want to look into the Studio version of DaVinci Resolve. Finally, you will miss out on stuff like noise removal, motion blur effects, HDR color grading, 3D camera tracking, etc. Unless you are a professional getting paid for their work by some big company or a Youtuber with 1M+ subs, you probably don’t absolutely need these tools. You’re already getting so much from the basic free edition.
Now that we’ve talked about Free vs Studio, let’s get into what actually makes DaVinci Resolve such a great choice for beginners who want to edit video game footage. First of all, it is an all-in-1 tool that combines editing, special effects, color correction, and audio postproduction into a single package. It has been used in postproduction for multiple Hollywood movies, TV shows, and commercials so you can tell that industry professionals love this software. The latest release, which is DaVinci Resolve 16, introduced a “cut page” which is all about enhancing the speed and improving turnaround times for high-end work like news cutting and TV commercials. But you can also use it for simple gaming videos at home. It lets you complete short-form videos more quickly, by streamlining the interface and adding specialized tools. You can import, edit, trim, add transitions, match color, mix audio, and do much more on a single page. The cut page also introduces a dual timeline system which greatly reduces the need to scroll or zoom in and out of timelines. Importing and exporting are super fast and easy, plus all the transitions and effects are located such that you can easily access them. The new interface removes everything unnecessary, cutting down on bloat and making the UI more intuitive.
Lightworks
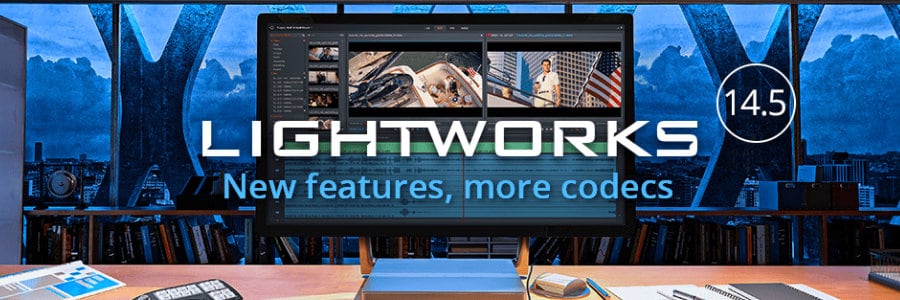
It gives you the power of a full-fledged professional-grade video editor for free. With one big caveat- you are limited to exporting at a max resolution of just 1280 x 720, using the MPEG4 and H.264 formats. Lightworks Archive is the only other export format available apart from those two. You’ll also miss out on user-definable project locations, which means you are forced to store project files in the default folder and can’t select a location manually. Advanced project sharing and 3D output are also disabled on the free edition, along with timeline rendering and AVID DNxHD codec support. AJA, Blackmagic, Matrox, and Mackie Mixer support is also disabled.
Now that you understand the differences between free and Pro versions of Lightworks, let’s talk about its features and strengths. Lightworks is a non-linear video editing program designed to make video editing simpler and more accessible for everyone. But it doesn’t compromise on functionality, as is evident from the fact that it has been used across multiple Hollywood blockbusters such as The Wolf of Wall Street, Hugo, The Aviator, Bruce Almighty, Centurion, The Departed, Braveheart, etc. Famous professional editors such as Tariq Anwar, Henry Stein, Jill Bilcock, etc. have used Lightworks in their projects. You can import in a variety of formats, in fact- all import formats supported by the Pro version are also supported in the Free version.
The visual effects tools in Lightworks are truly amazing, and they let you tweak every single detail on an image or video. Titles and text are super easy to work with, and you can customize their locations/ orientation down to individual pixels. When you’re working on larger projects that are very complicated, you can split the work into multiple virtual workspaces. Each workspace is called a room, and you can focus on multiple stages of the project simultaneously in this manner. Color grading is very advanced in Lightworks, you can adjust shade balance, convert colored video to monochrome, correct brightness and contrast, change color tones, and do much more. If you want to stylize your video with simple post-processing filters, Lightworks has that too. Lightworks also have several transition effects like Blend, Dissolve, Masked Blend, Push, Squeeze, Wipe, etc.
Olive
A project which is still in development, Olive has been grabbing the attention of many video editors across the world. Everyone from Instagram vloggers to gamers can benefit from using this, as it’s both powerful and easy to edit with. Currently, there are some aspects of this editor that can definitely be improved upon. Like the transitions, particularly video transition effects. A lot of transition effects you find in more mature editors are missing from Olive. It is also extremely easy to cut, trim, and piece together multiple video clips along with audio tracks and photos in a relatively short amount of time. The UI is pretty standard, you have a project area, a preview window, a timeline, and a media viewer window that shows you the properties of selected media.
The most impressive part of Olive is its performance. Even with 4k footage, you can easily scrub through the timeline on a mid-range PC. It is also not as likely to crash compared to some of the other free editors. And it’s open-source so you can run it on Linux, Windows, and Mac. Once you perform the relatively simple installation process (download from their website), you can start editing right away. Just drag and drop files into the project area, from here you can add them to the timeline. You can then incorporate stuff like transitions, special effects, etc. From the media viewer window, you can modify stuff like resolution, scale, framerate, etc.
One thing present in Olive which is absent from kdenlive, OpenShot, and Shotcut, is Bezier-curve animations. Olive also has proxy-clip support, so you can test your edits without completely nuking performance when working on extremely complicated projects. Hardware acceleration is supported, and Olive has a GPU preview that uses OpenGL for playback and GLSL effects. This allows you to have smoother timeline playback even on lower-end machines. Olive supports multiple export formats and doesn’t have a hard limit on the export resolution like Lightworks.
Blender
Ha! Bet you didn’t know Blender also had a built-in video editor. While it’s not as feature-packed or intuitive as something like Premiere Pro, you can use it to create some trailers for your video game that you are also developing with the help of Blender. Blender V.S.E (Video Sequence Editor) saves you from having to learn different software just to edit videos. Blender’s video editor lets you execute basic transitions with ease, you can use it to piece together gaming clips and add some music in the background. Creating intro and outro sections doesn’t feel as smooth, because Blender lacks some of the prebuilt title templates and special effects found in dedicated video editors. But with a bit of patience, you can definitely get stuff done.
You have live preview, luma waveform, chroma vectorscope, and histogram displays. You can control video speed, adjust layers, insert transitions, filters, etc. For audio, there is mixing, scrubbing, and waveform visualization. The one thing that makes Blender stand out (not in a good way) from other free video editing tools is the UI layout and shortcuts. But Blender is truly free, open-source, and much more stable than some of the dedicated video editing programs. Plus, the performance isn’t too bad. If you’re a Linux user, some of the free editing tools might not be available so Blender might be one of the few available options for video editing.
To summarize- yes, you can definitely edit videos in Blender, although I would recommend something like Hitfilm Express or Kdenlive if you have the choice. If you’re an experienced Blender user and just need to throw together a few clips in a sequence with some music underneath, Blender V.S.E is perfectly okay.
VSDC
It has one-click export templates for various social media platforms, so you can keep pumping out new videos for your audience daily. There are numerous transition and fade options, with frame-by-frame editing that is on par with some of the more popular advanced-level video editing software. You even get a green screen removal tool (Chroma key), picture in picture, masks, overlays, double exposure, and much more. VSDC can be used for basic editing like cutting, cropping, merging, rotating, etc. You can easily add stuff like transitions, subtitles, special effects, and more, within a few clicks. There’s a built-in converter that automatically recognizes the codec of a source file (that you could have captured on any device), and opens it up in the editing mode.
Unlike Lightworks, VSDC doesn’t implement any limits on output format or resolution. You can upload videos to Youtube in the codec and resolution of your choice, depending on what you feel is best according to your demographics. In fact, VSDC will directly upload to Youtube using the preconfigured template. It also has templates for Instagram, Facebook, and Twitter.
The Pro edition of VSDC adds a few extra goodies, like hardware acceleration and a multicolor Chroma Key tool. Professional videographers might want the Pro edition because it also opens up video stabilization, voice-over, audio waveform, etc. Hardware acceleration is the main reason you might want to upgrade if you’re an average user who just makes gaming videos since it significantly decreases export times for larger videos.
OpenShot
The best thing about OpenShot is its simplistic yet highly functional UI which contains everything you need, packed into an easily accessible cluster. You have a bunch of really impressive transitions and effects, which all have a thumbnail view so you get a visual representation of what they will look like before you use them. Another cool feature of OpenShot is the title templates. This comes in handy when you don’t really possess the time or skill to design your own elaborate title screens for videos. There are both static as well as animated titles, so you can select whatever you like the best.
OpenShot is both open-source and multiplatform, so you can use it on Windows, macOS, and Linux. It has a drag&drop system for quick and easy video edits. You can make gaming montages, social media videos, vlogs, and much more within no time thanks to the intuitive interface and robust performance. The software has some cool keyframe animation options too, and advanced preview methods. You can also modify clips straight from the preview window itself, but you can’t play with the proportions by holding down shift as is the case with most modern editing programs. Keyboard shortcuts are customizable, and you can drag UI elements around the screen to dock them in a different layout depending on your preferences.
OpenShot has a few flaws, as is the case with everything. It suffers from sluggish performance once you start adding in a bunch of layers and effects. Especially while working with 4K footage. And it does crash from time to time, even though the developers are constantly rolling out updates.
Apple iMovie
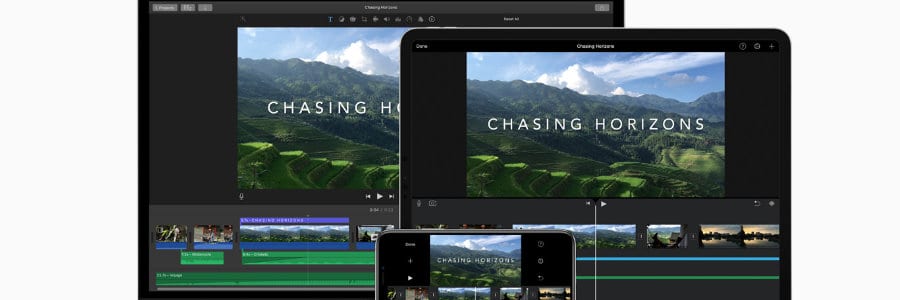
It’s an Apple exclusive, so you need an iMac, iPad, iPhone, or MacBook to use this software. Even though it’s free, Apple was generous enough to include support for 4K video editing and export. Apple has tried to make this software both elegant and intuitive at the same time, and I say they did a fine job. Adding titles, special effects, transitions, etc. feels effortless. There are green screen tools too, so you can place some really cool backgrounds behind yourself. Picture in picture is also available, as is split-screen. This is excellent if you want to make a pro gaming highlight clip showing the game from the perspectives of multiple players. And, you can focus in on high octane action sequences by slowing things down.
Want to put some filters on your video? Apple iMovie has a bunch of them, including monochrome, vintage western, futuristic, etc. The best part of iMovie is how seamlessly you can swap between various devices, without interrupting workflow. Start recording on your iPhone, use AirDrop or iCloud to transfer the files to your iPad. Make some cuts, merges, rotations, etc., and send it over to your iMac for color grading and special effects. With the MacBook Pro touch bar, you can access frequently used commands directly on top of the keyboard. Sharing your finished work is made easy since you can sync up iMovie directly to social media sites and video sharing platforms like Youtube for quick and easy exports.
Windows 10 Photos App

It’s the successor to a video editing software a lot of you guys might already be familiar with- Windows Movie Maker. Microsoft pulled Windows Movie Maker from the store some time ago, and the last version was released as part of the “Windows Essentials” package back in 2012. Windows Movie Maker was actually pretty good if you just wanted to upload a highlight montage of your Counter-Strike gameplay to Youtube. A classic, this software is what gave rise to the first decade or so of meme videos and gaming channels on Youtube. Just kids uploading Halo videos with Linkin Park playing in the background, and all sorts of other random stuff. Windows Movie Maker has been discontinued by Microsoft, so it no longer receives updates. But you can still download and use the older versions if you own a Windows PC. If you want an archived version of Windows Movie Maker (standalone software), you can download it from this site – mini-tool. Don’t worry, I have tested the download. It’s safe, and the software works well.
But if you don’t want to download older software that is no longer supported/ receiving updates, check out the Photos app. This little program is built right into Windows 10, so it should require no additional downloads. Just go into the search bar and type “Photos” and you will find it. Despite its name, the Photos app can also edit video footage. It has quite a few options when it comes to clipping, trimming, adding filters, etc. You can even pop in basic 3D effects like atomic motion, autumn leaves, breaking news, bubbles, butterflies, lasers, explosions, etc. These effects look sort of crummy, but if it’s a video you want to whip up in a few minutes for showing to some family and friends, Photos will get the job done just fine. In terms of filters, you’ve got quite a few- Inky, Energy, Loved, Pixel, Arcade, Denim, etc. You can also add motion such as zooming, panning, tilt, etc. It is also possible to add text and title cards or speed up/ slow down the footage. Photos will also let you add background footage or custom audio. There is a workspace to the left where you can add new files, a preview window to the right where you can scrub through the footage, and a “storyboard” at the bottom where you can switch between multiple files to work on.
Conclusion
What do you think of my list? Are there any other free video editing programs/ tools which you would like to see here? Let me know, and I shall check them out. In the meantime, I suggest you download a couple of these programs and start editing your very own gaming videos. It doesn’t take a whole lot of time to learn the basics, and who knows- your channel might get a ton of subscribers off PUBG and Fortnite videos alone. Kids love that stuff. On a more serious note though, I suggest you check out some of the more popular gaming channels and examine their upload schedule, video format, etc. to get an idea of how the Youtube algorithm works and which types of videos get the most views and engagement. Personally, I would just create the type of content I love and if it gets views, that’s great. In the end, it’s about doing what you feel like. Be creative, be free, and start making some videos.
If you found this article useful, you may want to save this pin below to your Gaming board.

iMovie is simple to operate and can meet the most basic needs, I like it so much, but sometimes i want to add more audios, and it supports too few tracks. Therefore, the Tuneskit AceMovi Video Editor I am also using, which is simple to operate and has rich functions, such as split screen. It’s not free, but I’ve got a free version on a giveaway platform.