In today’s gaming industry, we are tired of overhyped AAA titles, microtransactions, and a general lack of creativity (constantly remaking old classics and producing yearly sequels). Sometimes you just feel like going back to the good old days of gaming: no DRMs, no always-online gaming, and just pure gameplay.
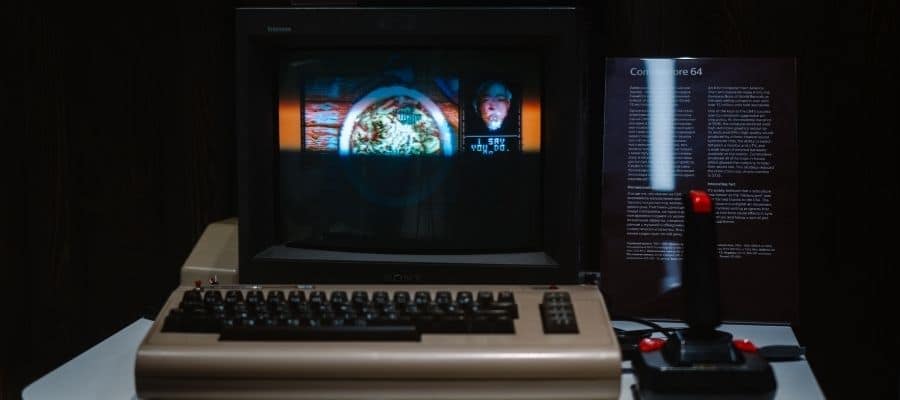
There is a reason retro gaming is slowly gaining popularity, and it isn’t just 45-year-old dads trying to relive their youth through Mario. Young gamers are also interested in trying out retro games to get a feel for it all started. Prince of Persia, Dangerous Dave, Contra, Sid Meier’s Civilization, and many other legends were born during the late 80s to mid-90s. A time in which the 3dfx Voodoo was considered premium-tier graphics and computers had dedicated soundcards to process game audio.
Fast forward to today, and Nintendo has released the NES Classic, while Sony has responded with the PlayStation Classic to attract retro gamers. And there are tons of open-source emulators out there which help you recreate the gaming magic of the 90s right on your Windows 10 PC. This is a great time to experience retro gaming, and our article will guide you through running classic DOS games on Windows 10.
So, how to play old DOS games on Windows 10? The easiest way to do it is by using DOSBox, a DOS emulator available for Windows, Mac, Linux, and various other operating systems. It creates a virtual environment on your PC that resembles the Disk Operating System. It can even emulate old hardware from that era, like soundcards and graphics cards.
DOSBox is a free, open-source program which means you won’t get in trouble for downloading and running it on your PC. But be careful with what you run on it. Abandonware and shareware shouldn’t be a problem, and it is awesome if you already own physical CD-ROMs or floppy disks of games purchased during the DOS era.
There are, of course, multiple ways to run old DOS games on your Windows 10 PC. If you’re using a 32-bit version of Windows, you can run most DOS games natively without requiring an emulator. You just have to install the NTVDM system, which will allow you to run 16-bit applications like DOS games. But things get more complicated if you’re running a 64-bit version of Windows 10, which the majority of PC users have nowadays.
Not sure if you have a 32-bit or 64-bit version of Windows 10? Just right-click the Start button, select “System,” and check the text for the System type, which should be under Device Specifications. For our system, it reads a “64-bit operating system, x64-based processor,” which means we are running a 64-bit version of Windows 10. Another easy way of knowing if you have a 64-bit system is to check the RAM amount; if it is over 4GB, you are definitely running a 64-bit version of Windows OS.
But there is no need to worry if you’ve got 64-bit Windows installed. As we’ve already discussed, you can just use DOSBox to emulate a DOS environment on top of your Windows 10 operating system. This will fool the old games into thinking that you’re actually running DOS.
And there are some frontend modifications you can install to access a GUI (Graphical User Interface) instead of the command prompt. And there are a few other ways to run DOS software on your Windows 10 computer, which we shall discuss later in our article. We will discuss if this whole process is legal, where you can download DOS games, how to set up DOSBox, and which games you should try out first. So bust out your old CD-ROMs, trackball mouse, and CRT monitor because we’re about to game like it’s the 90s.
If you already have your machine set up and looking for the best DOS games to play, you can check my post The Top 20 MS-DOS Games That You Must Play
Where To Get DOS Games And Is It Legal?
Do you own old CD-ROMs or floppy disks of DOS games from the 90s? If you own a floppy disk, an external 3.5” USB floppy disk drive like Mougerk is a great purchase. You will need one to install and run your game through DOSBox because we doubt your modern Windows 10 machine comes with a built-in floppy disk drive.
But what if you aren’t an old-school gamer and don’t have physical copies? What if you only recently got interested in retro games because your dad just can’t stop talking about how great gaming was back in the day? Well, no problem- there are plenty of sites out there where you’ll be able to download digital versions of old-school DOS games.
We recommend you download shareware or abandonware. Abandonware isn’t technically legal, as it may still be protected by copyright. But the game developers typically turn a blind eye since their game is literally decades old by now. People have been sharing resources online for quite a while, and abandonware is basically any old game that has stopped receiving support.
Either the studio has gone out of business, or they have been acquired by another company. This means that copyrights aren’t actively enforced anymore for such games. Check out myabandonware; they have a massive archive of old PC games dating all the way back to 1978! Tetris, Pacman, Galaxian, Xenon 2, Ultima, and Lemmings are some examples of the amazing retro games you’ll be able to download from here.
There are also plenty of DOS games that are 100% free to play, and you can legally download them. These games are published under Creative Commons licenses and are categorized as “Freeware.” Some of this freeware is also covered under a General Public License or some other copyright-free release.
Shareware games are similar, they are released free of charge to users, and the developer encourages people to make and share copies of the software. One nice place to find freeware DOS games is dosgamesarchive. Another great site to download DOS games is www.dosgames.com. These guys have been around since 1999, and their catalog contains over 900 free DOS games from all sorts of genres- 3D shooter, adventure, sidescroller, puzzle, etc.
The Different Ways Of Playing DOS Games On Your Windows 10 PC

Once you’ve procured a copy of the game you want to play, there are several options on how to run it. The first and easiest method is through DOSBox, which will emulate a DOS environment right on top of your Windows OS. It lets you mount game folders in virtual drives, from which you can either install or play whichever game you want.
There are frontends available for DOSBox, which can equip it with a GUI, allowing you to work with game files more easily. DOSBox can switch between windowed and fullscreen mode. It is capable of emulating various soundcards and graphics cards from the late 80s and 90s. DOSBox even facilitates multiplayer gaming through the IPX (Internet Packet Exchange) networking protocol.
The second method is using a 32-bit version of Windows 10. You may or may not have a 32-bit Windows OS installed on your system, but it doesn’t have to be Windows 10. This technique will work with Windows 7, 8, Vista, and even XP (if you still use that for some reason). Back when Microsoft released Windows Vista, they added a compatibility module called NTVDM or NT Virtual DOS Machine, which is sort of like an emulator for DOS.
This helped older programs run on Vista and ensured better compatibility. However, it isn’t installed in Windows 10 by default. If you try to run a DOS program on Windows 10 32-bit, it will prompt you to install NTVDM, which is a one-time affair. Once you’ve installed it, you never have to do it again. And it will enable your PC to run 16-bit applications designed for DOS, including retro games. Note that this is only possible with 32-bit versions of Windows, and these days most machines are equipped with 64 bit Windows by default since more than 4GB of RAM is pretty much mandatory on any recent PC.
The third and final method is to use vDos- an alternative to DOSBox. It, too, is an emulator designed to help you run DOS applications on 64-bit Windows systems. However, it isn’t catered specifically towards gamers like DOSBox. Instead, vDos is a more feature-rich environment for power users who want to run non-gaming DOS applications (it can still run games).
They also released a more powerful version called vDosPlus, which is loaded with some unique features like support for file-locking, which is essential for multi-user applications. It also has enhanced support for keyboards, mice, and displays. You can download vDosPlus here, and they even offer access to the full source code. Note that vDos is generally faster than DOSBox in several operations and has customizable printing + clipboard functions, which are not available in DOSBox.
Setting Up And Playing Dos Games With DOSBox On Windows
First, you’ll need to grab a copy of the game you want to play. We went with Doom, downloaded from DOS GAMES. Then head over to the DOSBox website and download the latest version for Windows. Install it.


Then we unzipped the contents of the Doom archive file into a folder titled “DOSGAMES” on our D drive. The contents of this unzipped file should look like this-

We recommend creating a common folder where you can place all your DOS games together, making navigation and mounting much easier every time you start up DOSBox. We also renamed the folder to “DOOM,” this should keep things simple and under 8 characters.
Next, we launched the DOSBox emulator from our desktop and were greeted with two windows- the actual emulator window and a status window which you can ignore for now.

DOSBox creates a virtual environment by running DOS on a special “Z” drive, which doesn’t actually exist in a physical location on your PC. What you need to do is mount the game folder. Mounting is a command within DOSBox that will connect physical folders and drives to the emulator. Note that you cannot access Z:\ because this is a RAMDrive where all the OS tools are stored. It is also unsafe to mount an entire drive to DOSBox, especially if the OS is installed on that drive. This is why you should only use folders and subdirectories.
In order to run games, we will mount our DOSGAMES folder that we created earlier in the D:\ drive to the virtual “C:\” drive in DOSBox. To do so, you need to type-
mount c D:\DOSGAMES\DOOM
The basic command is “mount c PLACE” where PLACE is the path of your game folder on the PC. It could be C:\DOSGAMES\DOOM if your game folder is extracted to the C:\ drive, or F:\DOOM if you simply created a DOOM folder in F:\ drive without a main DOS games folder.
If you’re loading from a CD-ROM, you will need to use the -t cdrom command for whichever letter your CD drive uses. For example, let’s say your “X” drive is the CD reader. You then type mount c X:\ -t cdrom. Note how there is always a single space between mount c and the path of your game folder/ CD drive letter.

Now you should see a message saying that drive C has been mounted as a local directory. Next, we need to switch over to C:\ drive, which you can do by simply typing C: and pressing enter. Now instead of Z:\> you should be seeing C:\> which means we’re on the right path.

Next, list all the files within the DOOM folder by typing dir and pressing enter. You will see a list of items with the file name, size, and type displayed in the DOSBox window.

Somewhere towards the bottom section of that list, there will be a .exe (executable) file called “SETUP.” We need to run this in order to configure DOOM, so go ahead and type SETUP, then press enter.
This should bring up a configuration screen, where you can select the soundcard, controller type, etc.

Leave all of this at default, except for one option. Go into “Select Controller Type” and choose keyboard+mouse. Now use the arrow keys to navigate down where it says “Save parameters and launch DOOM”.Press enter, and your game will launch. You can press alt+enter to switch into fullscreen mode. Press the same combo to switch back. If you don’t have a frontend installed, you will need to go through this mounting process every time you open DOOM.

Setting Up And Playing Dos Games With DOSBox On Mac OS

The process for installing and using DOSBox on Mac OS is pretty similar. We are using macOS Mojave version 10.14 for our example. First, open up Safari and download the DOSBox emulator version 0.74-3 for Mac OS X.

Next, go to DOSGAMES and download a copy of DOOM.

Now create a new folder called “DOSGAMES”

Move it into “Documents”

Go to Downloads, take the DOSBOX_DOOM.ZIP file, and copy it.

Now, move it over into the DOSGAMES folder within Documents.

Now it is time to extract the contents from this zipped archive.

Upon extraction, you will have a new folder called DOSBOX_DOOM. Delete the .ZIP archive file; you don’t need it anymore. Upon opening the DOSBOX_DOOM folder, it should look something like this-

Now go ahead and rename the DOSBOX_DOOM folder to just “DOOM.” Then, open up the DOSBox application.

Now type the following command-
mount c ~/Documents/DOSGAMES/DOOM

Next, type C: so you can switch over to C drive within the emulated DOS system.

Next, type dir and hit enter to get a list of files within this directory

Towards the bottom, you should see a file called “SETUP.”

To run the setup, just type “SETUP” and press enter.

This will bring up the configuration screen for DOOM. Here you can select the sound device, controller options, etc.

Leave everything at default, except for the “Select Controller Type” option. Navigate down there with arrow keys and enter, select “keyboard + mouse.” It will be on just the “keyboard” by default.

Now, select “Save parameters and launch DOOM”.

Which will bring you to the game screen.

Using A Frontend For DOSBox
Frontends help you install, view, and manage your DOS games. They slap a nice GUI on top of the boring command-line interface, which is honestly a huge turn-off for many of the new users that grew up in the Windows era. You can see a list of the major frontends on the download page for DOSBox; just make sure that the frontend you download is compatible with your OS and version of DOSBox.
We recommend DOSBox Game Launcher (DGBL), it is a portable multi-platform frontend written in Java, and the source code is out there for anyone to use. Once you set up a profile in DGBL, you won’t have to navigate to your game directory and mount it every single time you want to play the game. DGBL allows you to set up templates that will configure your DOS game for specific PC eras; you can also edit and create your own templates based on what profile you’re using.
It lets you choose which soundcard and graphics you want to emulate and helps you configure resolution, aspect ratios, etc. You can also view game metadata, like publisher name, release date, genre, basic storyline, URLs, PDFs, cover art, screenshots, etc. You can even create shortcuts for the games on your Windows desktop and import/ export game profiles. DGBL will even contact sites like MobyGames to fetch more information about a game.
Conclusion
If you aren’t really the type of person to set up and configure a command-line emulator to play retro games, there are other options. Maybe you should try looking for old games on the Google Play Store. But a lot of them will be modern copies of the original versions. And you won’t get an authentic experience on your phone compared to the large screen of a PC, with all the quirks involved in running such an old game.
Some might even argue that the problems encountered while configuring and installing these old games are part of the charm. You need to put in some effort if you want a satisfying reward. Don’t have any physical disks or digital copies of the original game ROMs? No problem, you can just visit GOG.com and purchase a bunch of retro games for meager prices.
If you found this article useful, you may want to save this pin below to your Gaming board.